Showing posts with label Tutorial. Show all posts

Fall Initial {Wreath}: Tutorial

I made this wreath in, maybe, 45 minutes to an 1 hour.  We were going to dinner at a new family's home and I wanted to bring them something more than the lavender plant we got for them.  So, I had a grapevine wreath I found at the Dollar Tree and went to work!


Supplies Needed:
(1) Grapevine Wreath
Brown Velvet Ribbon (or any that you have on hand)
A Variety of Artificial Fall Flowers (I used 1 large flower, 3 medium flowers, 5-6 small flowers, some yellow tiny flowers to fill in areas) and some random leaves pulled off of the stems
Hot Glue Gun
Hot Glue sticks
(1) Medium Sized wooden letter (I used an 'S' and painted it orange to match the flowers)


First, I painted the letter orange, and set it aside to dry, while I finished the wreath.  I used one quick light coat and then painted another regular coat on top of that.

Next, I glued the largest flower on first, then the 3 medium flowers around it.  Then, I put the smaller flowers at the ends and used the leaves and the filler flowers to cover any holes, etc.

I added buttons to the middles of the 2 smaller flowers on the ends of the grouping.  Then, I glued the letter on the flower grouping where I thought it looked best.


Next, I made a simple bow out of some brown velvet ribbon.  Thanks to Craft Dot Cupcake on YouTube for the tutorial!!   I glued it to the top of the wreath because I didn't think that it would look good as a dangling wreath.  So, the bow at the top would suffice.

That's it!  I hope you enjoyed this tutorial.  Let me know if you've made any cute fall wreaths!!


Monster Patch Jeans

I have seen a TON of different versions of these monster patch jeans.  Since it it Halloween season, I thought it would be a cute idea to make them for my son.  Lo and behold, he had a pair of holey jeans!!  (And, always the right knee...)  Here is how I made them, and I don't sew! :)


Supplies Needed:
A pair of Holey Jeans
White Felt
Red Felt
Navy Thread
A needle
Pinking Sheers

1.  Cut away as many pieces of string from the hole as you want.
2.  Cut a red felt piece slightly larger than the hole you are working with.
3.  Cut teeth with pinking sheers, in the shape you'd like.  (I did them pointy.)
4.  Cut triangles (or circles, or ovals) with pinking sheers for the eyes.
5.  Put the teeth on top of the red piece of felt, towards to top of the hole.  (Here, I used a bit of fabric glue to hold the teeth on while I sewed the patch on.)  Put on the inside of the jeans and adjust to where you'd like the patch.
6.  Use a needle and navy thread to sew around the hole, making the thread as noticeable as you can.  That is the beauty of this project: you HAVE to sew messily!!
7.  Put the eye shapes above the mouth and sew them on the jeans with an 'X' pattern.

That's it!!  Easy as pie!  Let me know if you've tried this type of project or not.  I'm curious to see yours!!

Thanks for stopping by!

Kim

Puppy Themed Boy's Birthday Party!!

When I asked my son what kind of party he wanted for his 5th Birthday, he said Chuck E. Cheese's.  I told him that was fine; but, asked him what 'theme' he wanted.  And he said he wanted a dog party.  Actually, it was kind of cute because he said it like this, "Mommy, I want a dawg pawty."  So, he got a puppy themed party at our local Chuck E. Cheese's...

Everything I made for the party was found either on Pinterest or somewhere through searching the Internet.   {Have I told you I was addicted to Pinterest??? :)}

We had a dog bowl cake and dog bone shaped sugar cookies that my crafty sister-in-law made.
(Go check out her Facebook page.  She specializes in beautiful sugar art, especially sugar skulls!!)


I made a banner with my son's name on it.   (See the dog bone shaped cookies under the banner...)  I printed the 5" circle banner from Sarah Hope Designs via Catch My Party.  Then, I cut them out and pasted them onto green scrapbook paper, punched two holes at the top with a hole punch and strung some cute ribbon through it.


There was a Puppy Adoption Station where the kiddos picked out a stuffed dog (from the Dollar Tree) and gave it a name.  I typed 'Adopt a Puppy Here' in Microsoft Word and changed the font and the colors.  I then printed it out and pasted it onto a piece of scrapbook paper, and added a little washi tape to the corners.  The Certificate of Adoption free printable can be found at Chickabug.


We also had Doggie Bags as the favor bags.  I used a mix of these cute dog print bags that I got off of Listia, and red paper cub bags that I got from the Dollar Tree.  I also gave small gifts to the siblings of my son's friends--there were only 3 or 4.  I put those in small brown paper treat bags. We just included the typical Dollar Tree trinkets (crayons, coloring books, etc.) as favors.  The Doggie Bags sign was made the same way the adoption sign was.

One more thing that I almost forgot was the kids' 'Dog Tags'.  They each got a necklace with their name on it on red craft paper that I Sizzix'd to look like a dog tag.  Not difficult at all.  I even think there are paper punches at your local craft store that are actually shaped like a tag...  {Sorry for the blurred faces of the kids.  I didn't want to chance it, and I wasn't able to contact all of their parents.  So, I just blurred them out.}  My little one, however, is in the middle!! :)

That's it for the puppy party!  We had a wonderful time and there were many compliments by the employees and other parents at Chuck E. Cheese's.  So, that made me feel all fuzzy inside!!


Check out these other super rad bloggers with some way cool party ideas!!  They are the ones I'm joining forces together with for the great Party Pack giveaway...

Events To Celebrate: 3 Birthday Party Invitation Ideas - Free Printables
Create & Babble: Party Decorations Round-up
Simplistically Sassy: Party Favor Ideas
Party Pixie: Party Planning Timeline and Stress Free Tips
Painless Meals: Party Planning on a Budget
Cupcake Diaries: Cupcake Shake Shooters
Lady Makes It: Allergy Friendly Party Ideas
Solace Amid the Chaos: Puppy Themed Birthday Party
You've Got Your Hands Full: 5 Party Themes for Twins

Also, here is the information on how to enter our big giveaway:
a Rafflecopter giveaway


Thanks so much for stopping by and good luck, if you enter!!

Menu Planning Board {DIY}

I promised a tutorial of the Menu Planning Board I showed a picture of in the Summertime Eat Down Your Pantry Challenge.  So, here it is...  It's a fairly simple project, and you can probably use lots of things that you already have around the house...


What's Needed:
An 8.5" x 11" picture frame or certificate frame
A piece of scrapbook paper to fit in the frame
7 Clothespins (or 5, if you only want to do a weekday plan)
Scrapbook Paper to put on the the clothespins
Mod Podge
Days of the Week Letters (S, M, T, W, etc.)
An envelope or make your own out of scrapbook paper
Plain white paper (cut into strips)
Laminator and laminating sheets
Hot Glue Gun
Dry Erase Marker

1.  Put your decorative paper inside the picture frame.

2.  Cut strips of paper as big as the clothespins, for 7 clothespins.

3.  Apply Mod Podge to the clothespin itself, then attach the strips of paper to the clothespins.  Apply Mod Podge over the paper.  Let dry over night.

4.  While waiting for the clothespins to dry, make the slips of paper that will be used to write the daily dinners on.  All you do is cut pieces of paper to the size that fits best with your picture frame.  Put them into a laminating sheet and run it through the laminator.   Then, cut the pieces out after laminated.

5.  Next, hot glue the clothespins to the glass of the picture frame.

6.  Then, hot glue the days of the week letters to the clothespins.

7.  Then, glue the envelope to the glass.  And, put the laminated slips into the 'pocket'.

8.  When you've planned your meals for the week, then write them on the laminated slips with a dry
erase marker, and clothespin them to the appropriate day of the week.

9.  Rotate meals as necessary.

I hope you enjoyed this tutorial, and are jumping at the bit to make one yourselves!!  Let me know how it turns out...

How do you make your meals "available" for your family to see (so they're not asking "What's for dinner?" all the time??

Thanks for stopping by!

4th of July Outdoor Wreath

I love wreaths!  I don't know why I am so very obsessed with them because I never have been--other than a real pine wreath at Christmas time on our door.

So, I made a simple, but elegant and refined.  Here's how I did it...


Items Needed:
Vine Wreath form (I used one I purchased at the Dollar Tree)

Red, White & Blue Garland (I purchased 2 sets at JoAnn when they were on sale)

Blue & Red Wire Ribbon with White Stars on them 

Red, White & Blue Felt Stars 
(you can make them yourself, but I purchased mine on sale at JoAnn)


<a href="http://www.bloglovin.com/blog/8560459/?claim=6m2trvy27bu">Follow my blog with Bloglovin</a>


Sugar Scrub {DIY}


Thank you so much for stopping by!  I am so glad you are here!!

This past weekend, I went CRAZY making sugar scrubs.  I have always loved them and loved giving/getting them as gifts, but I never really made any myself.  Until now...  I went through blogs, Pinterest, books to find the best 'recipe'; one that would suit my likings and those of my friends.  So, I came up with this:

Sugar Scrub

1 Cup Sugar (granulated or brown works best for me;
I also like Baker's Sugar-smaller granules)

1/2 Cup Coconut Oil (melted) (I LOVE the smell of coconuts!!) 
But, if you'd rather use another oil,
you can do Sweet Almond Oil, Grapeseed Oil, Olive Oil.) 
Be careful with Olive Oil.  It smells weird when you mix it with other Essential Oils.  But, if you like its smell, go with it!!)

15-20 Drops of Essential Oil
 (you can use more or less, depending on what your preferences are)

Citrus & Eucalyptus:
Lavender & Vanilla (I used Pure Vanilla Extract for  'flavor'):
 Coffee Coconut:
 
Add all the ingredients together and mix well.  Put the scrub into mason jars, tubs, containers that you like.  Decorate as preferred. 

Here are some of the items I used to decorate the mason jars--washi tape, scrapbook paper, cardstock:

Do you have any recipes for Sugar Scrubs?  Do you enjoy making them like I do? :)  Let me know...


Busy Bottles for Kids {DIY}


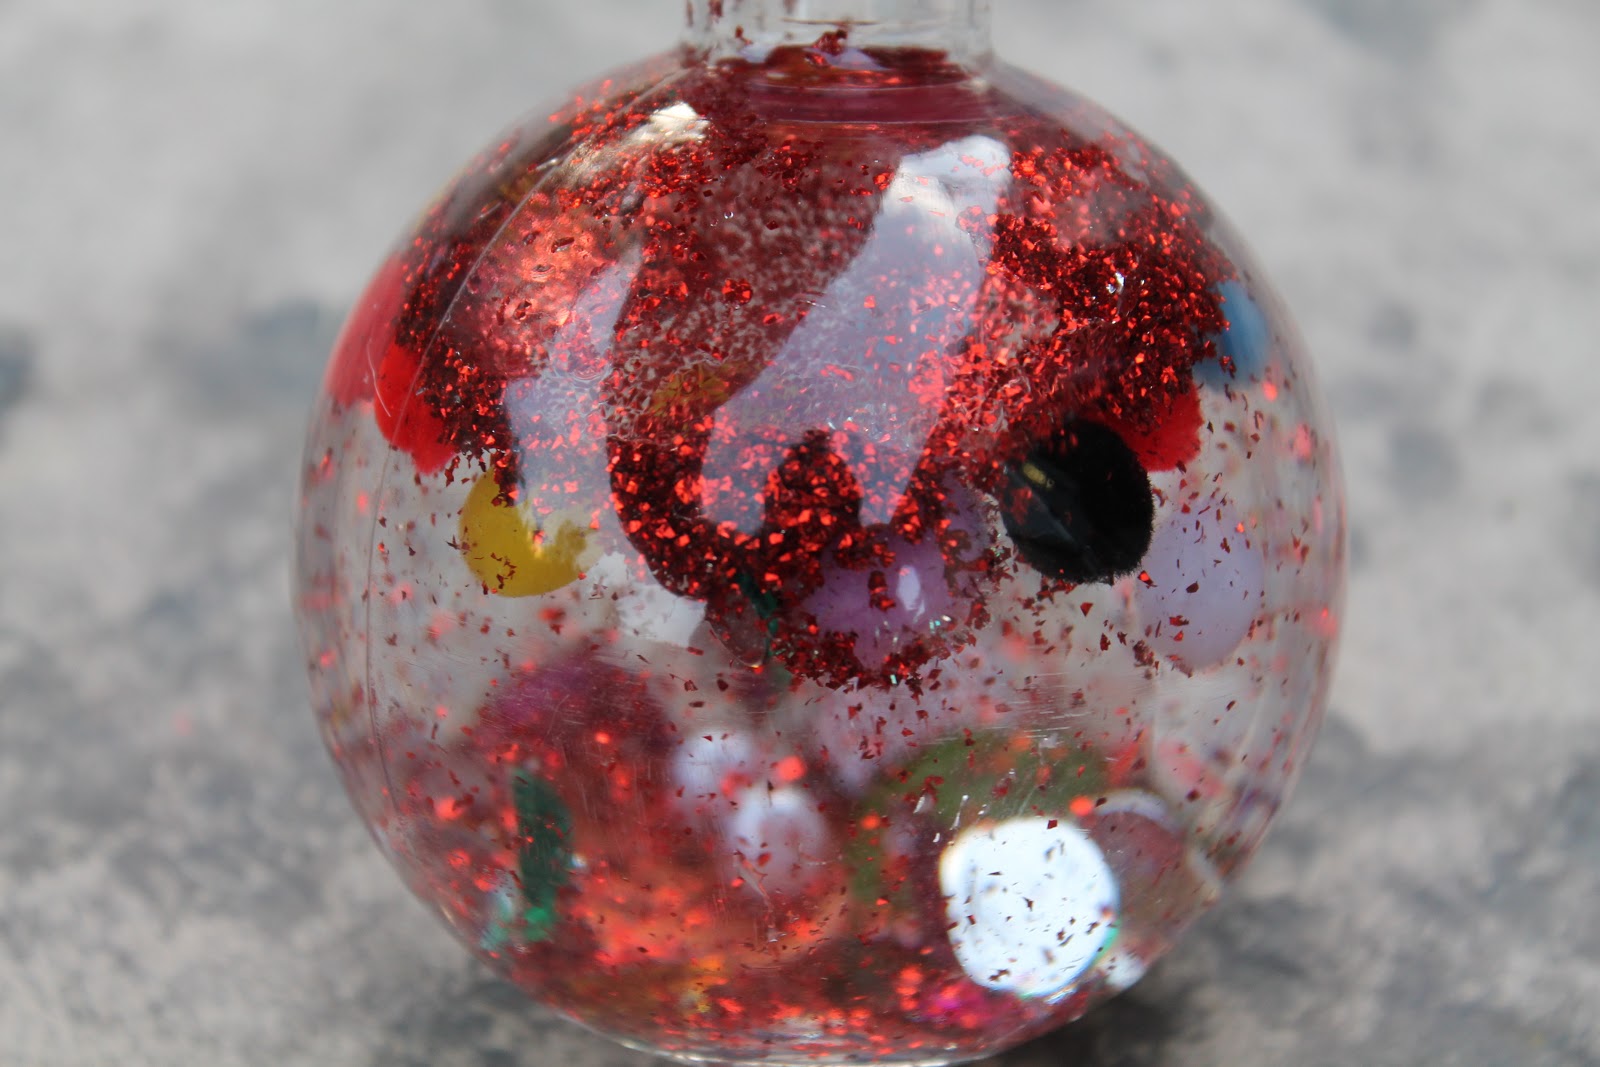
For the Summer Survival Challenge I am doing, a part of it suggests that we make a quiet time activities list for our children.  I made a good list of activities that I will have upcoming (DIY) posts on...  Some of my ideas were: file folder games (DIY); puzzles; Leap Pad or iPod; felt boards (DIY); beading-pipe cleaners, yarn, etc. (DIY); writing and letter tracing; coloring and drawing practice; sorting games (DIY) and Unifix cubes.  My last idea was something that I saw on a Sensory Processing website awhile back: Busy Bottles.  Not only were they fun for me and my son to make.  But, he enjoys looking at them and 'finding' what items are in there (like beads, buttons, pom poms, etc.).


Here are all of the things you will need for this project:

Small Plastic bottles
(I found these bottles at our local CVS pharmacy.  They had a sweet kids drink in them, so I just dumped it our and removed the label)


A variety of colorful, water resistant type of items: rhinestones, beads, glitter, pom poms, pearls

Water

Hot Glue Gun

1.  Empty the bottle(s) and be sure it is clean and not sticky. 
2.  Put the colorful items and glitter in the plastic bottle(s).
3.  Add water, but leave a bit of room at the top.
4.  Twist top onto the bottle and make sure it's tight.
5.  Hot Glue the cap onto the bottle.

That's it!!  This is a fun thing for kids to look at and keep them quiet (for a few minutes, at least) because they helped you make it.  The kiddos just LOVE to play with things that they helped make.


Have you ever made a busy bottle?  Oh, have you tried making a vortex out of two 2-Liter plastic soda bottles??  Here is where you can purchase the connector to make one:


Easy Peasy!


Thanks for stopping by,


Easy Teacher / Aide Gift: CRAYON CONTAINER


Hi there!  I discovered this simple teachers gift through none other than Pinterest.  There are so many variations out there, but I decided to do two small, but wide containers.  Getting the 'pattern' decided was the hardest part to this project!! :)

Here's what you'll need:
3-4 boxes of crayons, depending on your container
Glue Gun
Empty container: plastic, glass (from the dollar store), cans, cartons, whatever is available
Ribbon (optional)


I started with sorting the colors and shades together:  I put all of the reds together, then all of the oranges, etc.   Once I completed that, I figured out which patterns I wanted the crayons in.  We have 2 teachers at my son's preschool, so I used two different patterns.

The first one was the hues together: all the reds/pinks together, then all of the oranges/peaches, then all of the yellows, and so on.

The second one was the traditional rainbow colors: reds, oranges, yellows, greens, blues, and purples.  Here's a picture of that one as well:

After I decided on the patterns, I started hot gluing them onto my plastic container.  (They were actually powdered shake containers that I cut in half.)

I made sure that the {Crayola} was facing the outside, just so things could be uniform.  When I finished gluing the crayons all around the containers, I finished it up with coordinating ribbon.

I'll likely be filling these with candies and a gift card, or some pens/pencils, highlighters and the like.

I enjoyed making this simple project, and I know you will, too!

Here are some more pictures for you...


Linking to:
The Shabby Nest
A Peek into My Paradise
Monday Funday @ C.R.A.F.T.

Homemade Air Freshener Tutorial

I've always LOVED to have smelly candles or cute air fresheners around the house.  But, since my son came along, I kind of put all that by the wayside because I didn't want to have him get into any of those chemicals, etc.  So, when I saw THIS post about making your own air freshener, I got super excited!

Items needed:
1.  Baking Soda
2.  Your Fave Essential Oil
(I chose Orange Oil because we love citrus-y stuff in our house)
3.  A mason jar
4.  A hammer and nail or awl
(I had an awl in my craft 'tool' area, so I used that)
5.  Your own label for the jar, if you'd like
6.  Packing tape to attach that label.


So, put the baking soda in the mason jar--about 1/2 full.  Then, add 15-20 drops of the Essential Oil.  Screw the entire lid onto the jar, and hammer several holes in the top with the hammer an awl/nail.  Add the label to the front and you are done.


There after I made a few of them and scattered them around the house, I found that they really did not help "freshen up" any home areas much.  I wasn't pleased with the result, and will not make any more of these again. :(

Did anyone make their own air freshener that actually worked? 
If so, let me know...

-Kim